Laravel フレームワークが起動してから終了するまでの流れについて、コードを読んでみました。
今回読んだフレームワークのバージョンは、4.1.21 です。
エントリポイント
エントリポイントは、public/index.php です。
このファイルではコメントが多数ありますが、実際に処理を行っている行は、下記の 3 行だけです。
このコードから想像できるように、オートローダの設定、フレームワークの設定、そして実行という流れです。
require __DIR__.'/../bootstrap/autoload.php';
$app = require_once __DIR__.'/../bootstrap/start.php';
$app->run();
それぞれについて見ていきます。
1. bootstrap/autoload.php
ここでは、オートローダの設定を行います。Composerのオートローダもここで読み込みます。
先頭で現在時刻が定数として定義されているので、$_SERVER['REQUEST_TIME']の代わりに使えるかもしれません。
define('LARAVEL_START', microtime(true));
2. bootstrap/start.php
次にフレームワークとアプリケーションの起動を行います。
フレームワークの中核を成すIlluminate\Foundation\Applicationクラスのインスタンスを生成して、実行環境の設定、ファイルパスの設定を行って、フレームワークの起動ファイルを読み込みます。
最後に、Illuminate\Foundation\Applicationクラスのインスタンスを返します。
$app = new IlluminateFoundationApplication;

$env = $app->detectEnvironment(function() {
    return getenv('ENV_STAGE') ?: 'local';
});

$app->bindInstallPaths(require __DIR__.'/paths.php');

$framework = $app['path.base'].'/vendor/laravel/framework/src';
require $framework.'/Illuminate/Foundation/start.php';

return $app;
下記は、require文で読み込むファイルについてです。
2-1. bootstrap/paths.php
アプリケーション関連のパスが連想配列で定義されています。必要があれば、このファイルを編集します。
2-2. vendor/laravel/framework/src/Illuminate/Foundation/start.php
フレームワークの起動処理を行います。
Laravel をはじめる際につまづくことの多いmcrypt拡張チェックはここで行われています。
- error_reporting(-1)
- mcrypt 拡張チェック
- IoC コンテナに
$appを入れる - ユニットテストなら、
$app['env']に’testing`をセット - ファサードクラスの初期処理
- コアクラスを短縮名で呼べるように IoC コンテナに別名をセット
=> Application#registerCoreContainerAliases() - 環境変数をセット
=> .env.php or .env.${enviroment}.php の値を $_ENV / $_SERVER / putenv() にセット - Configクラス(
Illuminate\Config\Repository)を$app['config']にセット - 例外ハンドリングの開始
- display_errors を Off にする
- タイムゾーン設定(
date_default_timezone_set()) - AliasLoader()の設定
- HTTP メソッドのオーバーライド有効化
- コアのServiceProvider有効化
- bootedハンドラの登録(アプリケーション起動時に実行)
=> start/global.php の読み込み
=> start/{$env}.php の読み込み
=> routes.php の読み込み
3. $app->run()
アプリケーションを実行します。run()メソッドは、わずか 4 行です。
まず、Symfony\Component\HttpFoundation\Requestクラスのインスタンスを取得します。index.phpでは、引数をセットしていないので、IoCコンテナからインスタンスを取得します。
次に、実行するミドルウェアのツリーを構築して、handle()メソッドでアプリケーションの実行を行います。この行がアプリケーション実行の中心となります。
Symfony\Component\HttpFoundation\Responseクラスのインスタンスが戻り値として返るので、send()メソッドでレスポンスを出力します。
そして、最後に先ほど構築したミドルウェアツリーのterminate()メソッドを実行して、終了処理を行います。
これでアプリケーションが終了します。
	public function run(SymfonyRequest $request = null)
	{
		$request = $request ?: $this['request'];

		$response = with($stack = $this->getStackedClient())->handle($request); // (1)

		$response->send();

		$stack->terminate($request, $response);
	}
下記では、(1) の行について見ていきます。
3-1. $this->getStackedClient()
getStackedClient()メソッドでは、Stack/Builder を使って、実行するミドルウェアを組み合わせていきます。
ミドルウェアは、Illuminate\Foundation\Applicationクラス(正確には、`Symfony\Component\HttpKernel\HttpKernelInterface を implement したクラス)の Decorator となっており、それぞれの処理をアプリケーション実行の前後に挟むことができます。
デフォルトでは、以下の 4 クラスがミドルウェアとして登録されます。(handle()メソッド呼び出し順)
- Illuminate\Http\FrameGuard
- Illuminate\Session\Middleware
- Illuminate\Cookie\Queue
- Illuminate\Cookie\Guard
ミドルウェアはApp::middleware()で任意のものを追加することもできます。ただ、追加する場合は、Application#run()が呼ばれる前に追加しておく必要があります。
	protected function getStackedClient()
	{
		$sessionReject = $this->bound('session.reject') ? $this['session.reject'] : null;

		$client = with(new StackBuilder)
						->push('IlluminateCookieGuard', $this['encrypter'])
						->push('IlluminateCookieQueue', $this['cookie'])
						->push('IlluminateSessionMiddleware', $this['session'], $sessionReject);

		$this->mergeCustomMiddlewares($client);

		return $client->resolve($this);
	}
3-2. Illuminate\Cookie\Guard
直接Illuminate\Foundation\Applicationクラスのhandle()メソッドを呼び出すミドルウェアがこのクラスです。
実行するhandle()メソッドは、下記です。
	public function handle(Request $request, $type = HttpKernelInterface::MASTER_REQUEST, $catch = true)
	{
		return $this->encrypt($this->app->handle($this->decrypt($request), $type, $catch));
	}
1行で一気に書いているので、個々の文をばらしてみます。
	public function handle(Request $request, $type = HttpKernelInterface::MASTER_REQUEST, $catch = true)
	{
		$request = $this->decrypt($request);
		$response = $this->app->handle($request, $type, $catch);
		$response = $this->encrypt($response);
		return $response;
	}
まず、decrypt()メソッドでリクエストされたクッキーの複合を行います。
次に、自身が保持しているミドルウェアのhandle()メソッドを実行します。ここで保持しているミドルウェアは、Applicationクラスなので、アプリケーションが実行されます。
そして、最後にレスポンスのクッキーを暗号化して、レスポンスを返します。
つまり、アプリケーションが実行している間は、クッキーの内容は平文ですが、その前後で複合、暗号化を行っているので、この範囲外では、クッキーの内容は暗号化されている状態になります。
3-3. Illuminate\Foundation\Application#handle()
前途のとおり、Illuminate\Cookie\Guard#handle()から呼び出されます。
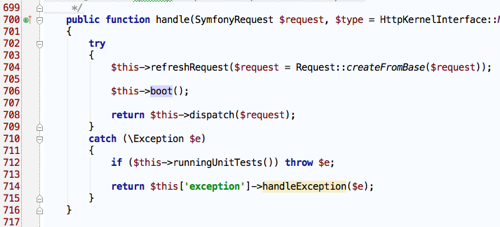
boot()メソッドでアプリケーションの起動処理を行い、dispatch()メソッドでアプリケーションを実行します。
この処理で、もし例外が発生した場合、IoC コンテナにある例外ハンドラで処理します。ユニットテスト中であれば、そのままスローします。
	public function handle(SymfonyRequest $request, $type = HttpKernelInterface::MASTER_REQUEST, $catch = true)
	{
		try
		{
			$this->refreshRequest($request = Request::createFromBase($request));

			$this->boot();

			return $this->dispatch($request);
		}
		catch (Exception $e)
		{
			if ($this->runningUnitTests()) throw $e;

			return $this['exception']->handleException($e);
		}
	}
3-4. Illuminate\Foundation\Application#boot()
Illuminate\Foundation\Application#handle()から呼び出されます。
アプリケーションのServiceProviderのboot()メソッドを実行していきます。
また、2-2. で登録したbootedハンドラは、ここから呼ばれるbootApplication()メソッドで実行されます。
	public function boot()
	{
		if ($this->booted) return;

		array_walk($this->serviceProviders, function($p) { $p->boot(); });

		$this->bootApplication();
	}
3-5. Illuminate\Foundation\Application#dispatch()
Illuminate\Foundation\Application#handle()から呼び出されます。
まず、メンテナンス中かを確認して、もしそうならilluminate.app.downイベントを発火してレスポンスを返します。
次に、ユニットテスト中かつセッション開始前なら、セッションを開始します。
そして、Illuminate\Routing\Routerクラスのdispatch()メソッドを実行します。
	public function dispatch(Request $request)
	{
		if ($this->isDownForMaintenance())
		{
			$response = $this['events']->until('illuminate.app.down');

			if ( ! is_null($response)) return $this->prepareResponse($response, $request);
		}

		if ($this->runningUnitTests() && ! $this['session']->isStarted())
		{
			$this['session']->start();
		}

		return $this['router']->dispatch($this->prepareRequest($request));
	}
3-6. Illuminate\Routing\Router#dispatch()
Illuminate\Foundation\Application#dispatch()から呼び出されます。
ここで、リクエストをアプリケーションに渡して実行します。dispatchRoute()メソッドがアプリケーション実行のメインです。
その前後では、before、afterフィルタが呼ばれます。それぞれrouter.befiore、router.afterイベンドが発火されます。
	public function dispatch(Request $request)
	{
		$this->currentRequest = $request;

		$response = $this->callFilter('before', $request);

		if (is_null($response))
		{
			$response = $this->dispatchToRoute($request);
		}

		$response = $this->prepareResponse($request, $response);

		$this->callFilter('after', $request, $response);

		return $response;
	}
3-7. Illuminate\Routing\Router#dispatchRoute()
Illuminate\Routing\Router#dispatch()から呼び出されます。
リクエスト内容から実行するRouteクラスを取得して、run()メソッドを実行します。これにより、app/routes.phpで定義したルーティングの内容が実行され、アプリケーションの処理が行われます。
run()メソッドの戻り値は、最終的にクライアントへのレスポンスとなります。
callRouteBefore()、callRouteAfter()では、Routeクラスで定義したbefore、afterフィルタが実行されます。(ex. Route::get(‘/’, [‘before’ => ‘auth’,… ))
callRouterBefore()メソッドの戻り値がnull以外なら、run()メソッドは実行されないので、authフィルタなど、アプリケーション実行前にチェックをかける場合はこれを利用することになります。
	public function dispatchToRoute(Request $request)
	{
		$route = $this->findRoute($request);

        $this->events->fire('router.matched', array($route, $request));

		$response = $this->callRouteBefore($route, $request);

		if (is_null($response))
		{
			$response = $route->run($request);
		}

		$response = $this->prepareResponse($request, $response);

		$this->callRouteAfter($route, $request, $response);

		return $response;
	}
さいごに
Laravel フレームワークの起動から終了までの全体の流れを見てみました。
流れとしてはそれほど複雑ではないのですが、Stack/Builder によるミドルウェアやイベント、フィルタなど、多くの箇所でアプリケーション固有の処理を差し込めるような仕組みになっています。
拡張できるポイントを分かっておくと、いつどこでどのように処理を追加すれば良いかが判断しやすくなります。
こうしたフレームワークのコードを読む勉強会なんかもやってみたいですね。


